Introduction
If you’re an avid gamer, you might have noticed that the stock Xbox controller’s analog sticks can sometimes feel unresponsive or less precise than you’d like. One way to enhance the gaming experience is by retrofitting the controller with a Hall Effect joystick. This guide will walk you through the process of replacing the stock sticks with high-quality Hall Effect joysticks, ensuring better accuracy and responsiveness in your gaming sessions.

Materials Needed
Before you begin, gather the following materials:
– Xbox controller (any model, including the original, 360, or Xbox One)
– Hall Effect joysticks (ensure they are compatible with your Xbox controller)
– Soldering iron and solder
– Desoldering braid (optional)
– Wire cutters
– Needle-nose pliers
– Isopropyl alcohol and cotton swabs (for cleaning)
– Heat shrink tubing (optional, for insulation)
– Helping hands or a steady hand (to hold components in place during soldering)
Safety Precautions
Before starting the retrofit process, it’s essential to take the following safety precautions:
– Ensure the Xbox controller is turned off and disconnected from the console.
– Wear safety glasses to protect your eyes from any soldering splatter.
– Work in a well-ventilated area to avoid inhaling fumes from the soldering process.
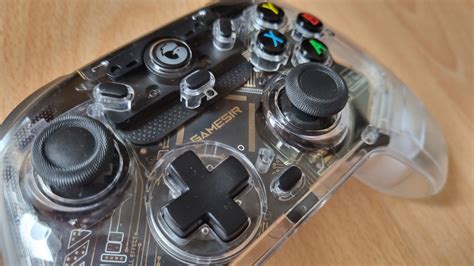
Step 1: Disassembling the Xbox Controller
1. Remove the back cover of the Xbox controller using a small flathead screwdriver.
2. Disconnect the battery from the controller.
3. Unscrew the screws holding the analog sticks in place and gently remove the sticks from the controller.
Step 2: Removing the Stock Analog Sticks
1. Use the desoldering braid to remove the solder from the top and bottom of the stock analog sticks.
2. Once the solder is removed, gently pull the sticks out of the controller.
Step 3: Preparing the Hall Effect Joysticks
1. Cut the Hall Effect joysticks to the appropriate length to fit into the controller.
2. Solder the wires from the joysticks to the corresponding pins on the controller’s circuit board. Ensure that the wires are securely connected and insulated with heat shrink tubing if desired.
Step 4: Reassembling the Controller
1. Place the Hall Effect joysticks into the controller’s slots, ensuring they are properly aligned.
2. Solder the wires from the joysticks to the controller’s circuit board, following the same process as in Step 3.
3. Reattach the back cover of the controller and reconnect the battery.
Step 5: Testing the Retrofit
1. Power on the Xbox controller and test the new Hall Effect joysticks by moving them around and ensuring they are responsive.
2. If necessary, adjust the position of the joysticks or the wires to achieve optimal performance.
Conclusion
Retrofitting your Xbox controller with a Hall Effect joystick can significantly improve your gaming experience. By following this guide, you’ll be able to enhance the accuracy and responsiveness of your controller’s analog sticks. Remember to take your time and work carefully during the process to avoid any damage to your controller. Happy gaming!